Lazy Day Makeup

So yesterday, I had one of those days... you know, the sort of day where you don't want to do your hair, your makeup, or even go to class. So I kept it lazy simple. REALLY simple. Almost too simple to even post! 


A cheesy pose? Maybe. I took this with the camera on my phone. Honestly, I like the quality and how pictures look with this versus my regular camera. My "real" camera always seems to capture pictures that make me feel self-conscious.


A picture taken just a few moments later with my real camera. Eeeek! I do not like how pictures come out, EVER, with this camera! 


Anyways... on to the hair and makeup. 
Hair: Nothing much going on here! Air dried from the night before,
I had my bangs french braided- nothing fancy, the braid was actually sort of messy,
nothing to show off : )

Makeup: No primer today. 
-Benefit Erase Paste in Medium on my under eye circles,
-Physicians Formula Multi-Colored Pressed Powder (that is a mouthful!) in the color "Beige" all over my face. 
-I topped that off with a light dusting of Maybelline Fit Me Powder in "245 Medium Beige" (a bit dark for me right now, but it is such sheer, sheer coverage that it really does not matter).
 -On my cheeks I had put Bare Minerals Blush in "Posh", 
-then with a light hand I also put Hard Candy's Blush Crush Baked Blush in the color "125 Living Doll" on the top of my cheek bones. 
-For my eyes, I curled my lashes, used Benefits' Bad Gal Lash, 
-and finally on my lips I used Loreal's Infallible Lipstick in "121 Perennial Pink".

GEEZ. I know, now it seems like I used a ton. To be honest, the names of the products I used add up to more than I actually wore! (Or so I would like to think!) 

What are your favorite products to use on your lazy days? 
   xoxo
 

My Go-To Skincare Products for Oily Skin

So let's face it... not all of us have the perfect "normal" skin type. I was blessed with oily skin. Not combination, just oily! I used to really dislike my skin type, but as I get older, I realize that having oily skin (if you take care of it) will allow you to age with less wrinkles, because you have more moisture form the sebum in your skin. With that being said, I have had to adapt to my skin, and control the oil. Here are most of the products I use daily to keep my oil under control (Links will also be included in case you want to know more about the product/purchase it).

  • ACNE FREE ALL DAY ACNE CONTROL FOAM- This product is great. I wish I had found it sooner. I just apply a dime-nickel size amount to my face, and allow it to soak in before I put on any primer or makeup. Not only does it keep your oily skin in check, but it also helps fight blemishes from forming.  You can find this here!

This is the full set of the foam products. I do not have them all yet, but I really should buy them set sometime when I run out of my usual face wash. Find them online here!


  • AVEENO CLEAR COMPLEXION CREAM CLEANSER-Although this is a slightly moisturizing cream cleanser, I think it works great with my oily skin. Plus, with oily skin you NEED to moisturize your skin! More on that in a second! Back to this product… not only does it help with oil control (in my opinion) but it also helps in reducing redness, and even acne scars. I don’t have many acne scars, probably around 5 or 6, but I have noticed a difference in the texture and marks on my skin. You can get this right here!


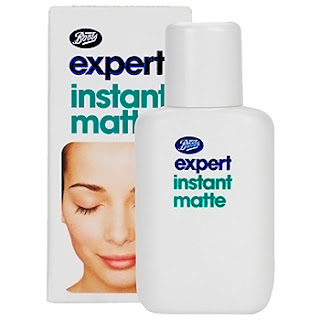
  • BOOTS EXPERT INSTANT MATTE- I do not use this liquid mattifyer every day, but I do reach for it now and then (if I am not feeling lazy haha). You just shake up the bottle and apply it to your skin with a cotton ball/pad, or a clean foundation brush. I find both to work very well, but if you do not completely rub it in it will leave a sort of white, powdery residue on parts of your face. Another way I use this is to mix a drop or two with my liquid foundation. This way, the white doesn’t appear, and it also is good for thinning out thick foundations! Get it here!


  • Oil blotting sheets! I was using the store bought ones, until I started making my own. Whenever I feel I look a little oily, I will just gently pat all around my face with one or two sheets. It’s key not to RUB, because your makeup has more of a chance to come off! I also feel like the patting motion helps absorb more versus just rubbing the oil back into your skin if you just swiped your face with the sheet.  Here is the kind I used to use from the store: 
   
CLEAN AND CLEAR OIL ABSORBING SHEETS- These really aren’t anything special. I would highly suggest making your own sheets so you can save your money and get the same result! But if you really want them...they are right here!


  • The most important thing you can do for yourself if you have oily skin is to MOISTURIZE. To some, that may sound like it would only make your oil worse, but I know first hand that it can make a huge difference. If you do not moisturize, your face will produce excess oil to make up for its lack of moisture. It just starts over compensating. When I first started moisturizing in the morning and sometimes even at night, I would find my face feeling oilier. I really think this happened because my skin was still producing extra oils, and the lotion was just sitting on my skin. However, once I had been using moisturizer about two weeks, I noticed a huge difference. My skin stopped compensating for the lack of moisture and just allowed me to have a more manageable, less oily face! Here are my favorite moisturizers right now:

 
THE BODY SHOP TEA TREE SKIN CLEARING LOTION- This stuff is amazing. I used this day and night usually. It is especially for oily skin, as it has oil-controlling properties (the tea tree oil) while it also hydrates. It feels really “cool” on your skin, and has a minty smell. Get it here!


 I also suggest investing in a night cream/thick face lotion. I do not mind having a slightly over oily/moisturized looking face when I sleep! No one will really see me, plus I am letting my skin get the extra hydration it needs. This is the one I use: 


ST. IVES TIMELESS SKIN COLLAGEN ELASTIC FACIAL MOISTURIZER- Very thick in consistency, but absorbs well into the skin. I love how my face feels right after I put it on, and when I wake up in the morning. The smell is also pretty refreshing! Get it here!


**If anyone is interested in my Go-To Makeup Products for Oily Skin, let me know : ) 

DIY: Oil Blotting Sheets


Tissue paper. I am sure everyone has received a gift at one point that contained it; blue, green, Christmas patterns, or even sparkly. What do you do with it? Save it for future gift giving (I do this usually!), or put it to use for something else? One day, I came up with another use for it when I realized I was out of my drugstore oil blotting sheets. I remembered I had tissue paper in one of my desk drawers from a birthday present I had received weeks before. I decided to test my theory that it would absorb the oils on my face. To my delight, it did! Theory proved! I am so glad I ran out, and that I have stacks and stacks of tissue paper from years of receiving gifts. Being a college student does present its financial woes, but now, I have one less thing to worry about buying! Here is how you can also make your own blotting papers!

STEPS:
Step 1) Find your tissue paper! Even if you do not have old tissue paper on hand, buying a pack of it from any store that sells it will probably be cheaper than buying the actual oil blotting sheets.
Step 2) Choose the amount of sheets that you want to make. You can use all of your paper, or just take one single sheet.
Step 3) Lay out the paper(s). I find it fastest and easiest to fold the paper(s) once in half and cutting it along that line so you have a straight edge. Once you do that, place those two separate stacks on top of each other. Do this process as many times as you see fit (this will help keep your pieces neat, and allow you to get the size you want).


 You should get something that looks similar to this:

Step 4) Storing them: I store mine in a zip lock bag, and I find this works just fine because I keep them on my desk. If you were going to keep them in your purse, I suggest finding a hard case like this one that will keep them from getting wrinkled or even putting them in the section of your wallet where you keep your paper money.
I am so sorry if this sounds confusing! It is honestly so easy that I think explaining it just makes the process more difficult.
 Step 5) Blot away! I find that these work just as well as any store bought brand. 

**Side note: As an avid member of the Youtube beauty community, I came across videos of this idea after I decided to make my own. If you need a little help with visualizing this, try typing in “DIY Oil Blotting Sheets” in the search bar and I am sure you will find something to help you!